Tuesday, November 24, 2009

Puzzle Blocks


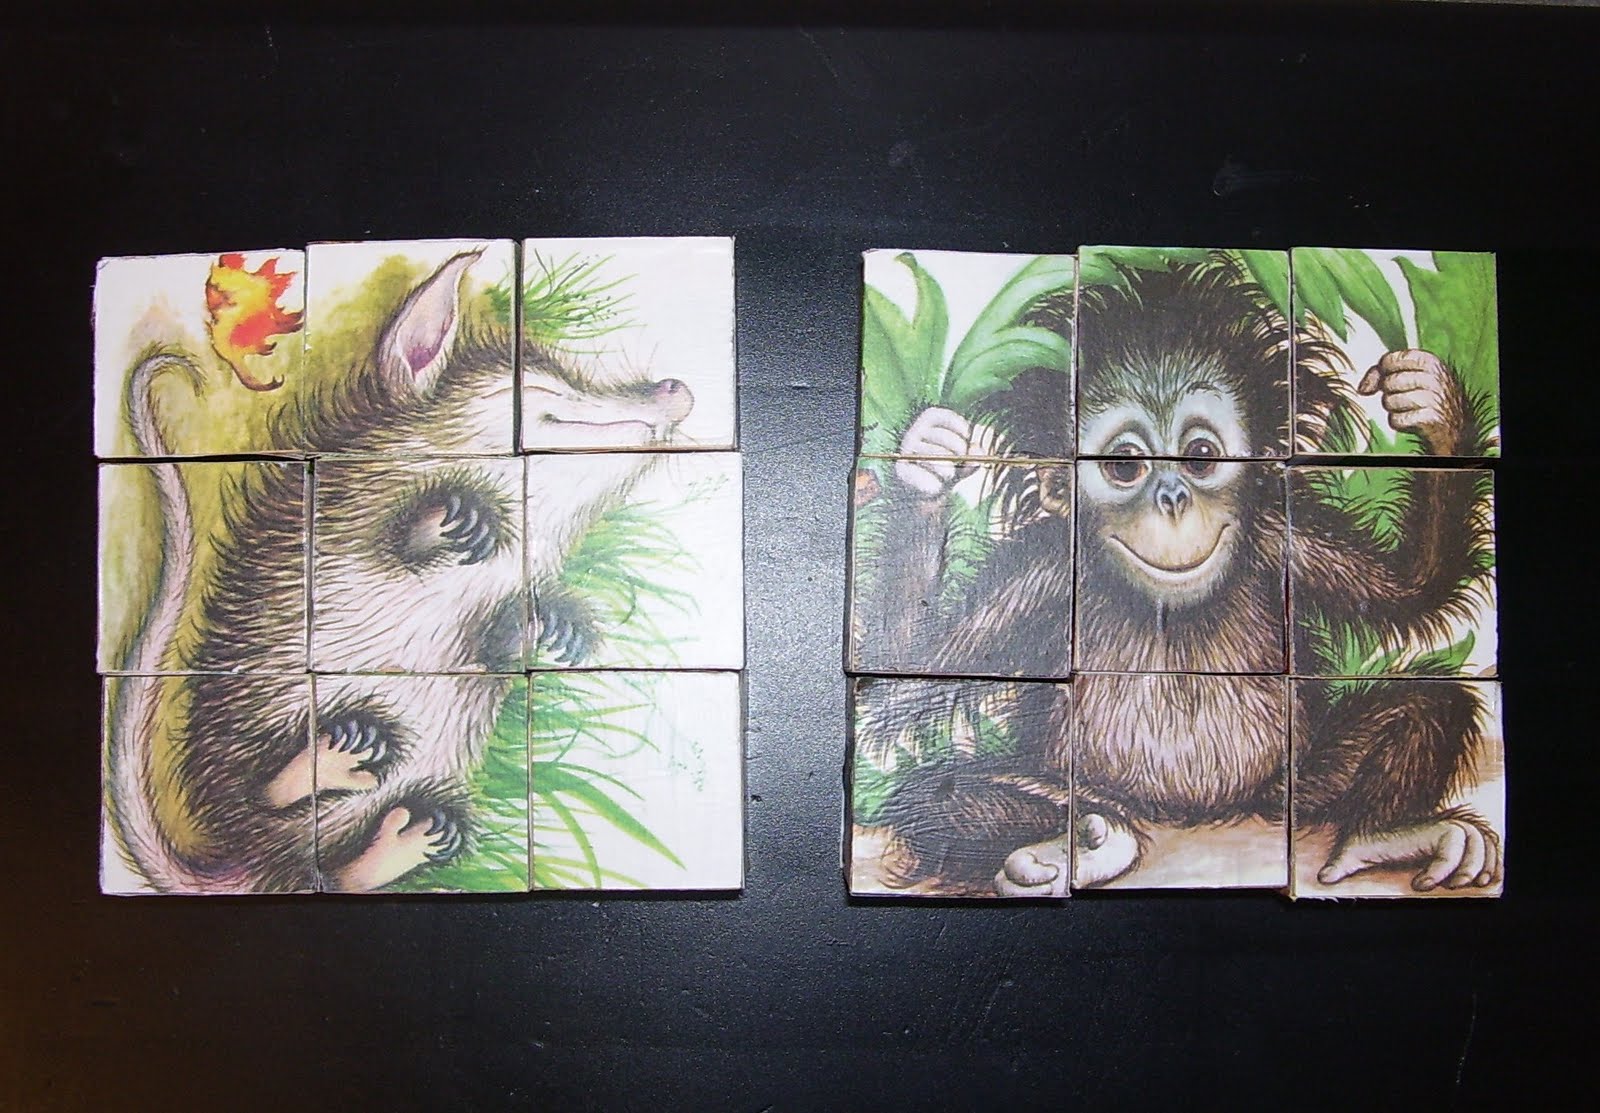
These puzzle blocks were easy to do and turned out very cute!

Supplies needed:

9 Wooden blocks (I used 1 3/4" unfinished blocks, and lightly sanded them)
6 pictures of the right size (mine needed to be 5 1/4" square)
Mod Podge and foam brush
paper cutter or scissors
craft knife
ruler


I laid out my blocks, I originally thought I would make a 4x4 puzzle but ended up deciding on a 3x3 puzzle instead.  I bought these unfinshed, so they needed to be lightly sanded.also be aware that they may not all be perfect cubes, many of mine weren't.

All of my pictures came from this book. It was exactly enough for two puzzles.


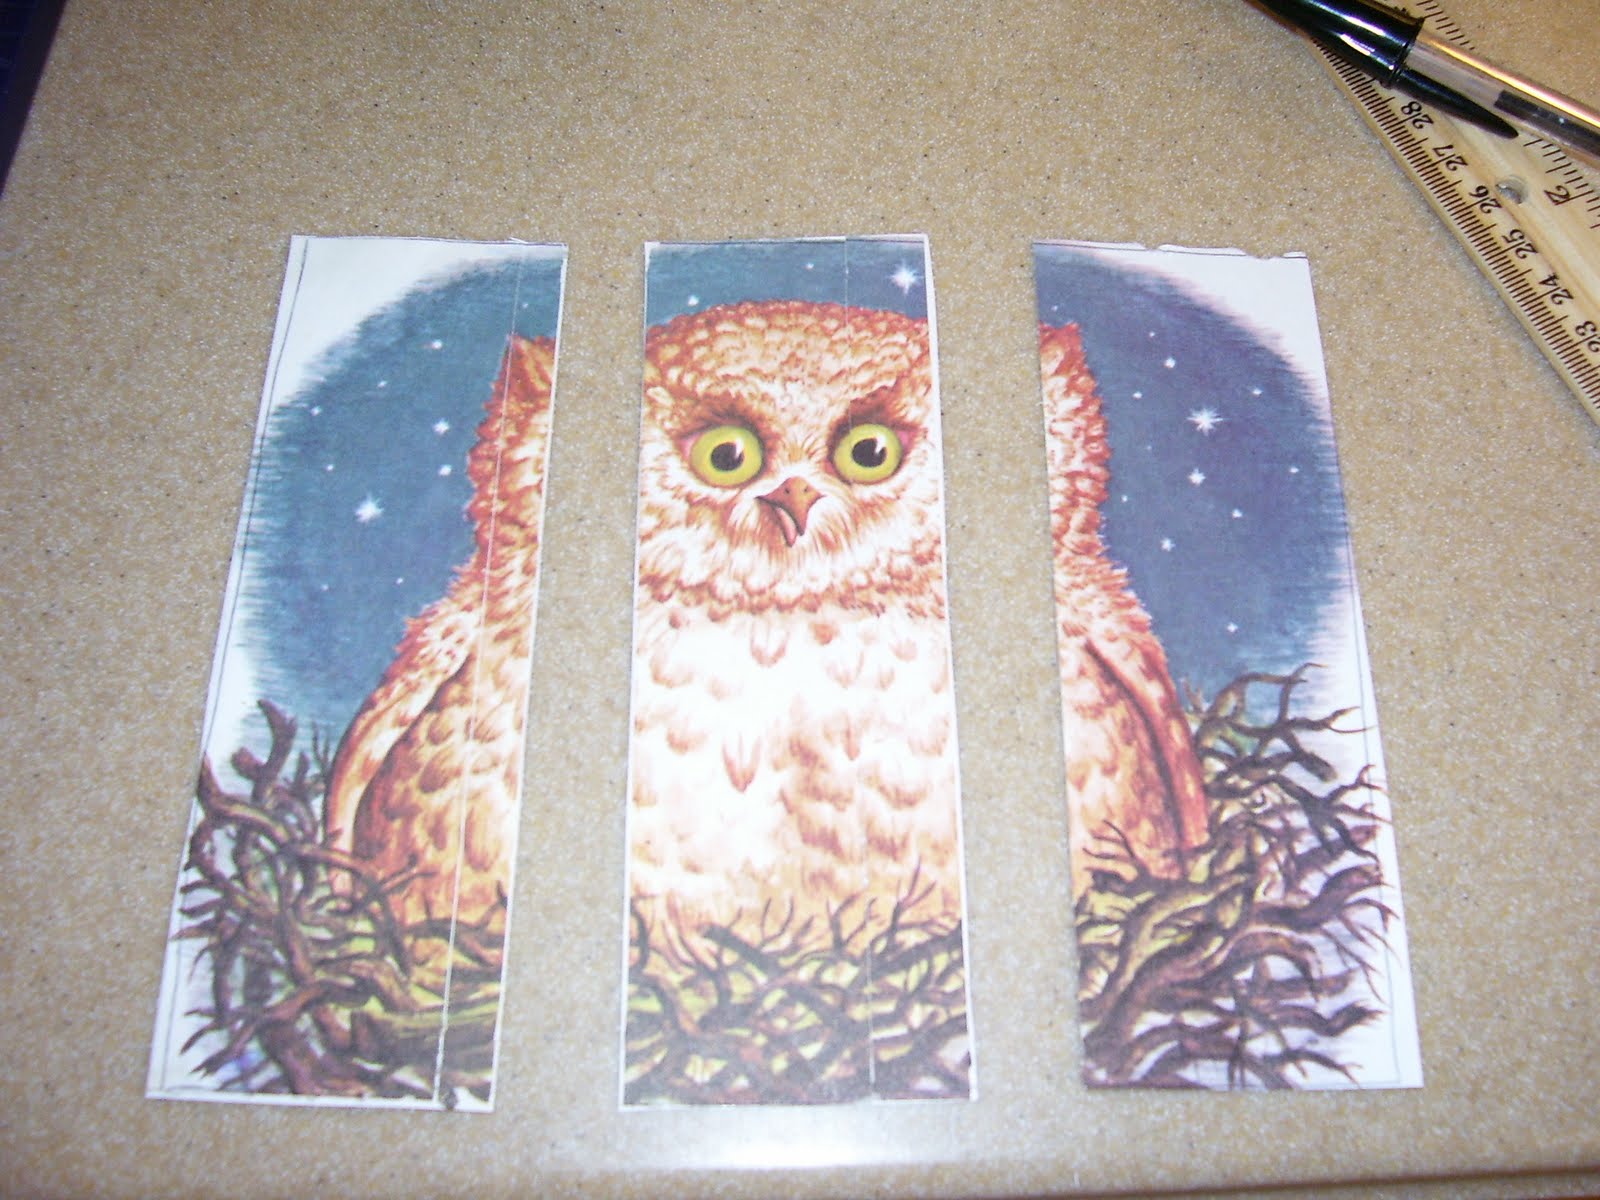
I made a rough template that was 5 1/4" by 5 1/4" so that I could use it like a 'window' to get an idea of which of my pictures would work.


I knew my blocks were 1 3/4 inches so I then used the paper cutter to make them into squares.


Once that was done I simply Mod Podged them onto the blocks.

 
You may notice that some of your picture pieces hang off the edge. 


Nearly all of mine did, at least a bit.  I used a craft knife to cut off the excess, and later even scissors, I found that either way worked just fine and it wasn't a problem.  though when you are applying your pictures try to make sure that the excess parts are not the really important parts, like the face.

Continue this process until all of your pieces are applied.  I found that all of them needed an additional coat of Mod Podge.


Wednesday, November 11, 2009

Baby Blocks


My husband and I decided to do a homemade christmas this year and I have been busy the last few weeks trying to get as much done as I can before we go visit for Thanksgiving. 


These blocks were simple to make, though time consuming waiting for coats to dry.  I ordered unfinished 1 3/4" blocks online, it was much cheaper than buying them from a craft store.  I lightly sanded them and painted them a cream color.  I mod podged on some fun scrapbook paper and sanded some more.  I think they turned out pretty cute!

Monday, October 19, 2009

refurbished bookshelf/desk

Here is the before shot of the bookshelf/desk.  Not bad looking, but not what I wanted.  (Isn't my son a cutie?  He insisted on being in the picture.)  I tried sanding it a little, but it isn't real wood and that wasn't working out so well, and wasn't doing much, so I did two coats of primer instead.


 Then two coats of white paint in a semi gloss and about a yard of Mary Engelbreit fabric and Thrifty Decor Chick's trick  for the back of the shelves!  I think it turned out SO cute!  I wish this was for our home, but sadly, it has somewhere else to live.  Luckily it is already out the door, or I may have changed my mind.  I just love it!


Wednesday, October 7, 2009

mod podge jewelry box


I made over this sad sad jewelry box with Amy Butler paper and Mod Podge. This is for a my 10 year old neice, do you think she will like it?


Sunday, September 27, 2009

Thrift Store Treasure!


Like many of you, I love thrifting!  The other day I about DIED when I found this bag of "potpourri" at the local DI for ONE DOLLAR! I was so excited, it was such a rush and so cheap, practically felt like I was stealing!   It was such a fun find!  I have lots of neutrals in my home,but no purples or greens, I don't know what I am going to do with those.  ---did you see those purple balls? how cute are those?? I need to find some where to use them! hmmm, maybe another giveaway? what do you think? should we have a vote?


Wednesday, September 23, 2009

Month to Month Blocks


This is a project I did about a year ago.  I made enough blocks to be able to spell out each month.  There are a total of 27 blocks and they are 5 1/2 inches square, and 1 1/2 inches deep.  I thoroughly sanded each block (this part took the longest). Then I painted each block and distressed all of the edges. I mod podged a letter on each block. (though in hindsight I would probably do a letter on each side to cut down on the number of blocks, but that would take a lot of figuring out which letters you never need together!) This is an easy project, but it is time consuming.  If you want to try this yourself you may want to do a month at a time and build up your 'collection' as you go.  

break down of the blocks you need

A 2    B 1    C 1    D 1    E 3    F 1    G 1    H 1    I 1    J 1    L 1    M 1    N 1    O 2    P 1    R 2    S 1    T 1    U 2    V 1    Y 1  total 27

I think this would be cute with some scrapbook paper behind the letters too.  My taste is more simple, and that is why I chose to do it this way.  If you do attempt this, please email me pics, I would love to see your version!

Tuesday, September 22, 2009

no winner?

Well, I haven't heard from the giveaway winner and it has been 24 hours.  I am not really sure what to do.  Should I draw a new name? Should I give her more time? Should I try to track her down?  Should I just forget about it?

What do you all think?

Monday, September 21, 2009

WINNER!! WINNER!!

WOW! Thanks so much to all of you for entering in the giveaway! I have been absolutely amazed by the response.  I did the best I could to make sure everyone got the entries they were entitled, (many who said they were following didn't show up on my list, but I entered you anyway, just in case!) 
And the winner is........

Amy!

who said
I just popped over from ShadyCreek Lane. I'd love to enter. Thanks. : )
You have 24 hours to leave a comment with your email address, or I will choose another name.


Like I said, I was overwhelmed by the response, so I decided a little bonus was in order! I am also going to be sending a small pumpkin to the next 5 people who comment! YAY! Thanks again to all who paticipated, and check back soon, I have several things I want to show, but I wanted to wait till the giveaway was over.

Wednesday, September 16, 2009

Stuffed Pumpkin Giveaway!!!

Interested in a giveaway?  I know I love them, though I never seem to win.  I am going to be giving away some STUFFED PUMPKINS!  In order to enter simply leave a comment.  If you want an extra entry become a folllower, for an additional entry post about it on your blog and mention it in your comment.  This is what the fabric will be. 
I am thinking 3 pumpkins, 1 large and 2 smaller ones.  However, if we get over 100 entries then I think I will have to add a second set.  Giveaway open until midnight on Sunday.  What do you think?  I am excited about this! yay! 

Monday, September 14, 2009

Bread Box to Charging Station

Participating in Metamorphosis Monday over at Between Naps on the Porch
I was browsing crafting blogs the other day and found this awesome breadbox makeover here at "Bloggin' It". I was so impressed and I have been wanting to have a charging station forever. I was so excited when the next time I was at DI and I spotted a bread box. I was so excited, I immediately remembered the blog post I had seen and just had to buy this nasty, dirty bread box. It was $3. When I brought it home my husband thought I was insane for buying something so grody, but I had big plans for it!First I cleaned it as well as I could. I actually had to get a scraper out it was so gross. I also used some Pledge on it, it made a big difference. Still was ugly, but at least it was clean! Next I disassembled it. Not hard. Just unscrewed the hinges and took the staple out of the plastic that held in the glass. I originally thought I would put some fabric or paper over the glass but as I was cleaning it I decided to try the scraper on it and it worked like magic. (I placed the glass on a green towel) This was hardly any effort at all. Hubby cut a small hole in the back and then it was time for paint! I primed it. Twice. I originally thought I would paint it black, but I have SO much black, I thought maybe I should pick up more of my accent color, maroon. So, I painted the inside black and the outside maroon. I did two coats of each. (this picture is after my first coat) I waited a few days and the reassembled it. I took the knob from my stash, it is from one of the dressers that I re-did. I just used the original hinges, though I think I will eventually replace the knob and the hinges. I put a power strip inside the box and then put our internet box and phone chargers in it as well. I am LOVING it. I am considering distressing the edges, but I am scared to! Maybe another day?
(if you liked the stuffed pumpkins be sure to enter into the giveaway!)